The purpose of this particular build was to give me a model for the Inter Club Fun Fly series of events which appear to be gaining in momentum - particularly in the NW of England where I live.
This is my derivative from the original plan, named Kanga, hopefully, it will bounce just as well.

The biggest change to the original design was to extend the fuselage to accommodate the lighter electric motor and LiPo. Mounting the elevator and rudder servos in the rear necessitated a further extension.
Following discussions with Andy Ellison, a few other tweaks were made to make it more rugged and help it survive the rough and tumble of a Fun Fly contest.
Tailplane and Fin
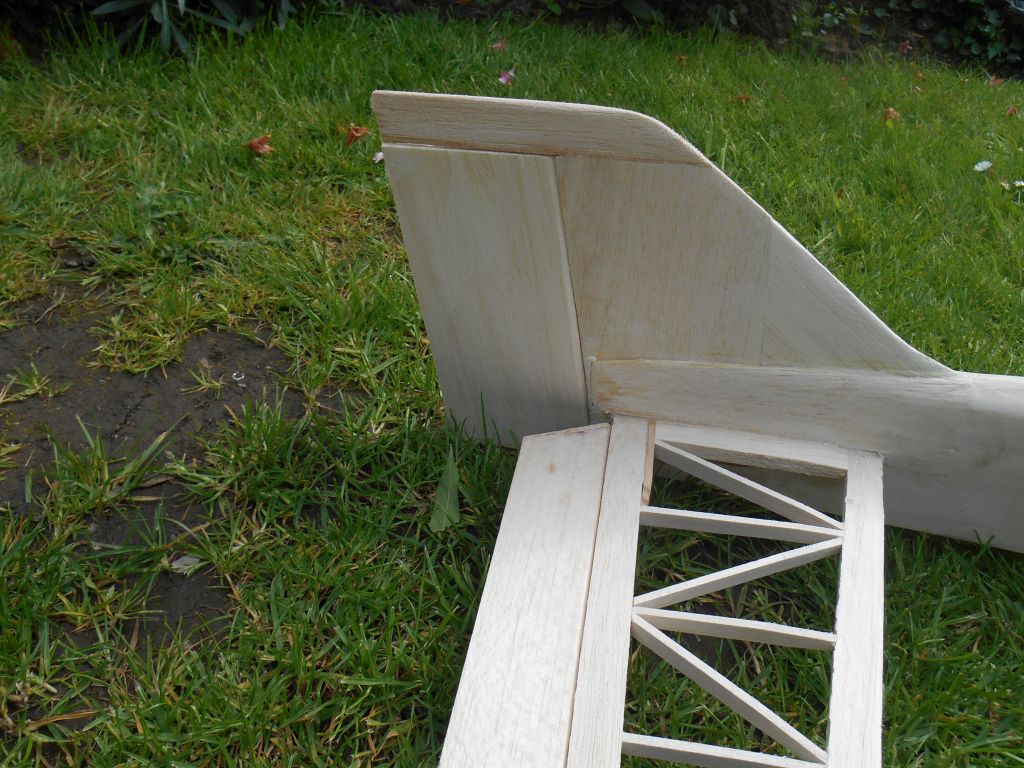
These were built almost exactly as per the original Joey but with 0.014" Carbon Fibre bracing doubler along the tailplane spar and the front of the fin post. Hinges are carbon fibre sheet which also add additional toughness.


Tailplane construction starts with the pre-hinged spar and elevator joiner. 1.5 mm spruce doublers are inlaid into the joiner that links the two tailplane halved together

The almost completed tailplane. Hard points for the horns are yet to be added
Wing
The LE and front spars were laminated from 2 x 3 mm sq spruce, the main spar is 6 mm square balsa with a spruce doubler, top and bottom as shown on the original plan. The gap between the ailerons has been increased by 30 mm and the wing is now retained by bands, rather than bolts as per the original. A 2 mm carbon fibre rod brace has been embedded into the LE at the centre section (approx 30 mm each side of centre) to prevent dings from forming in the LE if the wing swivels around the fuselage former. Wing tips are 5 mm balsa with lightning holes. The main spar is extended to the tip along with the upper of the rear spars.

Wing ribs are cut using a ply template. Note the use of building tabs to prevent twists (warps) being built into the wing

Wing construction is quite simple. No plan is needed, simply mark a line for the Trailing Edge of the wing, then mark out the positions of each wing rib. Pin down the lower spar and then add the ribs, making sure they are upright and square. Add the TE, upper spars and leading edge.

There are two ribs that are close together that have the aileron servo tray sandwiched between them. Adjust the height so that the top of the servo turret is about 3 mm above the top of the rib. I mounted my servos on the top of the wing for protection, convention dictates that they are located under the wing.

The wing D box is sheeted with 1.5 mm balsa and with 1.5 x 8 mm cap strips behind the D box. The TE has a 1.5 mm x 8 mm false TE, top and bottom that sits over the real TE.

Wing tips are 5 mm light balsa with lightning holes. Note that I have also added lightning holes in the external wing ribs. Every gram counts. A short length of triangle stock to keep the tip square and the spars are extended to the top. At the very rear of the tip, there is a tapered strip of 1/16" ply to add a little extra local strength

Fuselage
Basically a simple box construction, 2.5 mm balsa sides, 1.5 mm balsa top and bottom. 1/16" ply doubler from the front former back to behind the aileron clearance cut out and 1/32" ply doubler around the tail. 3 mm longerons top and bottom between the ply doublers. The 1/16" ply doublers have 26 mm lightning holes cut in them down the full length
A 2.5 mm Lite ply deck sits from behind the front former to half way down the wing and is used to locate the ESC (top behind the motor), LiPo, underneath and Receiver - under the wing.
The former in front of the wing is 3 mm birch ply which interlocks with the deck and also the small 6 mm undercarriage mounting plate.
The engine mount former is also 3 mm birch ply. a third former located at the TE of the wing is made from 2.5 mm Lite ply.
The unusual part of the fuselage is the cut away behind the main part of the wing. This allow the wing to skew without impact the ailerons or risking damaging the aileron servos. It was originally intended to fill this 'gap' with a soft foam block but that was purely for aesthetics.


Fuselage construction is the traditional simple box. The cut out to clear the ailerons if the wing got skewed looks quite odd but I have to admit I quite like it. It has Character.. :)


Bare bones

You can see the wing mounted and the slot for the ailerons - to allow the wing to twist on impact and hopefully not rip the ailerons off.

ESC located above the battery in a screwed down hatch


The rear skid is stitched using Kevlar thread to a 3mm plate and epoxied into place.
It looked like this before its maiden.


Contrasting colours - probably not needed on this model..
With the model completed, I only managed to get 3 flights in before the InterClub Competion

The first flight ended prematurely when the motor mount broke. Looks like it failed because I hadn't balanced the prop correctly. The replacement is cut from the next gauge up dural. That will not break..
My Inter Club comp flights were great fun but made me realise I had a lot to learn.
1. I had to fly a lot closer in than I normally do. I had problem keeping the model on track and judging the distance away from me. My 4th round Limbo flight ended after I 'took out' the far limbo pole which damaged the firewall but the rest of the model was unmarked... I can see this flying close and judging distance being a problem to me. Practice, practice, practice
2. Its very draggy - but adding more drag showed that I had insufficient power. In the water carry task, the take off was long and I could barely build up enough speed to perform the loop. I have subsequently fitted a larger prop which is within the power capacity of the power train.
3. The undercarriage wasn't strong enough. On the triple thrash (3 Touch and Go, 3 Rolls, 3 Loops) my second T&G removed the front u/c mounting. Easily fixed but it failed far too easily. This has now been replaced with a 12g leg and this is now bolted to the Firewall
After the comp, I replaced the Firewall with 6mm ply (was 3mm ply) and added Carbon Fibre reinforcement.

I have had a few more flights including some targeted hard touch and go's and it hasn't failed yet.
My thoughts on the model is that its a bit on the heavy side now - Although not dreadfully heavy, it could do with being 0.5kg lighter. Something to think about for the next version. Its great fun and dead easy to fly though
Roll on the next comp. That was really enjoyable.