The full build blog is here on the Model Flying Forum
A few photos and a bit of description
The fuselage went together very quickly. Basically, its a box with corner reinforcement. I have made a couple of minor changes to simplify it further - hopefully keeping the weight down and the fuselage straight
It looks like this after the formers and sides have been added.
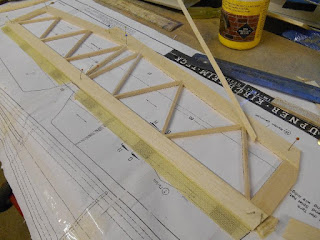
The tailplane is hollow - hinges are made from Kevlar sailcloth which I find to be very tough.
When complete, its sheeted top and bottom in 1/16" balsa. Light and strong
For the first time, I used a bubble app on a smartphone to align the tailplane. The upper deck is parallel to the fuselage datum so it was quite simple to set the fuselage level then move the phone onto the tailplane and make the minor tweaks to get the tailplane level and horizontal. I still use the three point method to check that the tail wasn't twisted. Basically, this involves using a length of string, measuring from the tip of the tail to the centre of the deck at the front and adjusting so that the distance to both tips is the same. Easier to write than do - quite a fiddly exercise
The fin was aligned using a laser alignment tool. You need to make sure that the laser is dead centre on the fuselage or you will build in a twist trying to get the alignment right
SLEC snake pushrods have been fitted and the lower sheeting added - the grain running crosswise for stiffness


No comments:
Post a Comment